Introduction
Tile adhesive plays a crucial role in the world of construction and renovation, particularly in ensuring durable and long-lasting tile installations. Its importance cannot be overstated, as it directly impacts the quality and longevity of the finished project. Here’s why tile adhesive is indispensable
Bonding Strength: Tile adhesive creates a strong bond between the tile and the substrate (such as concrete, wood, or drywall). This bond is essential for preventing tiles from shifting or coming loose over time, especially in high-traffic areas or areas prone to moisture.
Versatility: Tile adhesive comes in various formulations to suit different types of tiles (ceramic, porcelain, natural stone) and substrates. This versatility ensures that regardless of the specific requirements of the project, there is an adhesive suitable for the job.
Water Resistance: Many tile adhesives are formulated to be water-resistant or even waterproof. This is crucial for areas like bathrooms, kitchens, or outdoor spaces where tiles are exposed to moisture regularly. Water-resistant adhesives help prevent moisture infiltration, which can lead to mold, mildew, and structural damage over time.
Flexibility: Flexibility in tile adhesive is essential, especially in areas where temperature fluctuations or substrate movement are common. Flexible adhesives can accommodate slight movements without compromising the integrity of the tile installation, reducing the risk of cracks or dislodgment.
Ease of Application: Modern tile adhesives are designed for ease of use, typically coming in pre-mixed or easy-to-mix formulations. This simplifies the installation process, making it more efficient for contractors and DIY enthusiasts alike.
Longevity: A well-installed tile floor or wall can last for decades, and the right adhesive is crucial for achieving this longevity. By providing a strong and lasting bond, tile adhesive helps ensure that the tiles remain firmly in place for years to come, reducing the need for costly repairs or replacements.
Aesthetic Appeal: Beyond its functional benefits, tile adhesive also contributes to the overall aesthetic appeal of the finished project. A properly installed tile surface looks clean, uniform, and professional, enhancing the visual appeal of any space.
Understanding Tile Adhesive
Tile adhesive, also known as tile mortar or tile glue, is a specialized bonding agent used to affix tiles to surfaces such as walls, floors, or countertops. Its primary function is to securely bond tiles to the substrate, ensuring they remain in place over time despite various stresses such as foot traffic, temperature fluctuations, and moisture exposure.
Composition:
Cement: Cement is a fundamental ingredient in tile adhesive formulations. It provides the adhesive with structural strength and binding properties. Portland cement, a common type used in construction, is typically the base ingredient.
Sand: Sand is often mixed with cement to improve the adhesive’s workability and to prevent shrinkage during curing. The sand also contributes to the adhesive’s ability to fill gaps and create a strong bond with the substrate.
Polymers: Polymers play a crucial role in modern tile adhesive formulations. These can include various types of polymers such as acrylics, latex, or ethylene-vinyl acetate (EVA). Polymers enhance the adhesive’s performance by providing flexibility, water resistance, and improved adhesion properties. They also help to reduce the risk of cracking or debonding, especially in areas prone to movement or vibration.
Functionality:
Adhesion Strength: The primary function of tile adhesive is to create a strong bond between the tile and the substrate. The combination of cement, sand, and polymers ensures a reliable bond that can withstand the stresses encountered in typical usage scenarios.
Flexibility: Flexibility is essential, especially in areas subject to temperature changes or structural movement. Polymers in the adhesive formulation allow the adhesive to flex without cracking, ensuring the integrity of the tile installation over time.
Water Resistance: Polymers also contribute to the adhesive’s water resistance, making it suitable for use in wet environments such as bathrooms, kitchens, or outdoor installations. This water resistance helps prevent moisture from penetrating beneath the tiles, which could lead to mold growth or substrate damage.
Durability: Tile adhesive is designed to provide long-term durability, maintaining its bond strength even in demanding conditions. Properly applied and cured adhesive can support the tiles for many years without the need for repairs or replacements.
Types of Tile Adhesive
Cement-Based Tile Adhesive:
- Composition: Cement-based adhesives are made from a blend of cement, sand, and sometimes polymers or additives to enhance performance.
- Characteristics:
- Versatile: Suitable for most types of tiles including ceramic, porcelain, quarry, and natural stone.
- Good for porous substrates: Works well on cementitious substrates like concrete and cement backer boards.
- Affordable: Generally more cost-effective compared to epoxy-based adhesives.
- Setting time: Offers sufficient working time before it sets, allowing adjustments during installation.
- Suitability: Ideal for indoor and outdoor applications, such as bathrooms, kitchens, and floors.


2. Epoxy-Based Tile Adhesive:
- Composition: Epoxy-based adhesives consist of epoxy resins and hardeners that react chemically to form a strong bond.
- Characteristics:
- Exceptional bonding strength: Provides high adhesion strength, making it suitable for heavy or large tiles, and high traffic areas.
- Chemical resistance: Resistant to water, chemicals, and temperature variations, making it suitable for wet areas and areas exposed to harsh conditions.
- Non-porous: Suitable for non-absorbent tiles like glass and some types of porcelain.
- Limited working time: Sets quickly, so it requires efficient and quick installation.
- Suitability: Ideal for areas with high moisture levels, such as swimming pools, showers, and industrial environments.
3. Ready-to-Use Tile Adhesive:
- Composition: Ready-to-use adhesives come in pre-mixed form, usually with a water-based or solvent-based formula.
- Characteristics:
- Convenience: No mixing required, ready to apply directly from the container, saving time and effort.
- Consistency: Provides consistent performance and eliminates the risk of incorrect mixing proportions.
- Limited shelf life: Once opened, ready-to-use adhesives have a limited shelf life compared to powdered adhesives.
- Limited versatility: May not be suitable for all tile types and substrates.
- Suitability: Ideal for DIY projects, small installations, or situations where convenience is a priority.
Application Techniques:
Surface Preparation:
Clean the Surface: Ensure that the surface where the tiles will be installed is clean, dry, and free from any dust, grease, or debris. Use a vacuum cleaner or a broom followed by a damp cloth to clean the surface thoroughly.
Repair Any Imperfections: Fill any cracks or holes in the surface with an appropriate filler and allow it to dry completely before proceeding.
Smooth the Surface: If the surface is uneven, use a leveling compound to create a smooth and level substrate for tile installation.
Prime the Surface: Depending on the type of substrate, you may need to apply a primer to improve the adhesion of the tile adhesive. Follow the manufacturer’s instructions for the appropriate primer.
Mixing Ratios:
Read the Instructions: Different types of tile adhesive may have varying mixing ratios, so it’s essential to read the manufacturer’s instructions carefully.
Mixing: Typically, you’ll mix the adhesive powder with water in a clean bucket using a drill with a mixing paddle attachment. Follow the recommended water-to-adhesive ratio provided by the manufacturer.
Consistency: Mix the adhesive until you achieve a smooth, lump-free consistency. Avoid over-mixing, as this can affect the adhesive’s performance.
Application Methods:
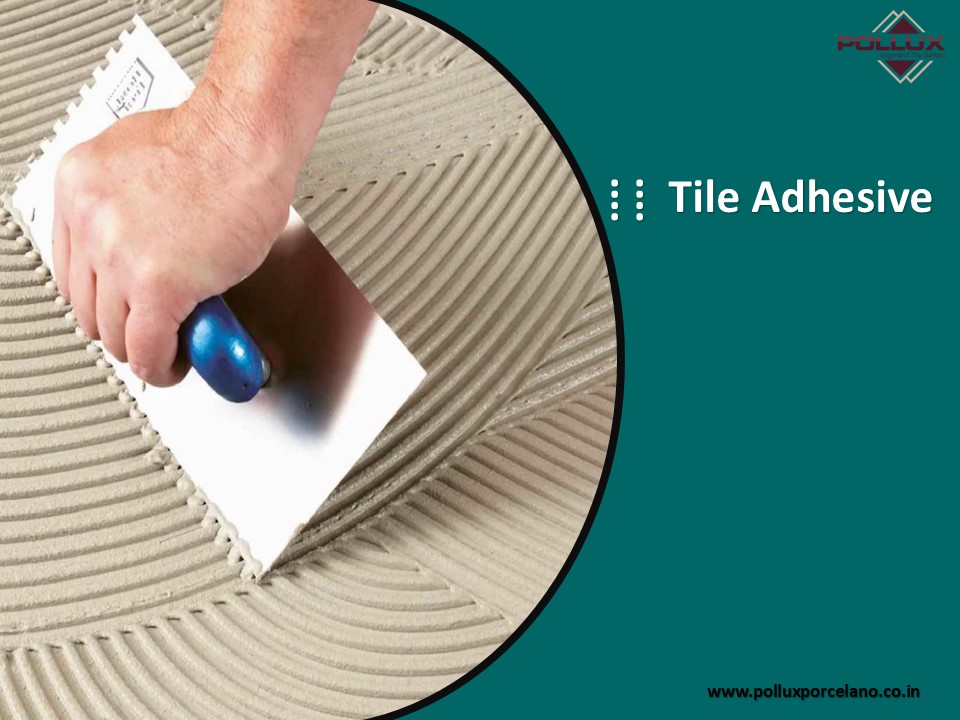
Trowel: The most common method for applying tile adhesive is using a notched trowel. This ensures proper coverage and helps create uniform ridges for better tile adhesion.
Notched Trowel Size: Choose the appropriate size of the notched trowel based on the size and type of tiles being installed. Larger tiles may require a larger notch size to ensure adequate coverage.
Spray: In some cases, tile adhesive can be applied using a spray system. This method is often used for large-scale installations or when working with non-standard substrates. Follow the manufacturer’s instructions for the specific spray equipment and application technique.
Step-by-Step Tile Installation:
Plan Layout: Before applying the adhesive, dry-fit the tiles to determine the layout and ensure proper alignment. Make any necessary adjustments to accommodate cuts or special features.
Apply Adhesive: Using the notched trowel, spread a layer of adhesive onto the surface, covering an area that you can comfortably tile within the adhesive’s open time (the time during which the adhesive remains workable).
Create Ridges: After spreading the adhesive, use the notched edge of the trowel to comb through the adhesive, creating ridges of uniform height. This helps ensure proper coverage and bonding.
Place Tiles: Carefully press each tile into the adhesive, twisting slightly to ensure a good bond. Use tile spacers to maintain consistent grout lines between tiles.
Check Alignment: Periodically check the alignment of the tiles using a level or straightedge. Make any necessary adjustments before the adhesive sets.
Clean Excess Adhesive: As you work, periodically clean any excess adhesive from the tile surfaces and grout lines using a damp sponge or cloth.
Allow to Cure: Allow the adhesive to cure according to the manufacturer’s instructions before grouting the tiles. This typically involves waiting at least 24 hours, but it may vary depending on factors such as temperature and humidity.
Grout Joints: Once the adhesive has cured, apply grout to the joints between the tiles using a grout float. Press the grout into the joints, then wipe away any excess with a damp sponge.
Final Cleanup: After the grout has dried slightly, buff away any haze from the tile surfaces with a clean, dry cloth.
Seal Grout (Optional): Depending on the type of grout used, you may need to apply a sealer to protect the grout from stains and moisture. Follow the manufacturer’s instructions for the appropriate sealing process.
Advantages of Using Tile Adhesive
Using tile adhesive offers several advantages over traditional methods like cement mortar, making it a preferred choice for many construction projects:
Improved Bond Strength: Tile adhesive provides a stronger bond between the tile and the substrate compared to cement mortar. This enhanced bond strength ensures that the tiles remain firmly in place even under heavy foot traffic or other stresses, reducing the likelihood of tiles becoming loose or cracked over time.
Reduced Installation Time: Tile adhesive typically has a faster drying time compared to cement mortar, allowing for quicker installation of tiles. This can lead to significant time savings during construction projects, helping to expedite timelines and reduce labor costs.
Ease of Application: Tile adhesive is easier to apply than cement mortar, especially for non-professionals. Its smooth consistency allows for easier spreading and uniform coverage, resulting in a more efficient and hassle-free installation process.
Water Resistance: Most tile adhesives are formulated to be highly resistant to water, making them ideal for use in wet areas such as bathrooms, kitchens, and swimming pools. This water resistance helps prevent moisture from seeping through the adhesive and damaging the substrate or the tiles themselves.
Temperature Resistance: Tile adhesives are designed to withstand a wide range of temperatures, making them suitable for both interior and exterior applications. They can tolerate temperature fluctuations without compromising their bond strength or integrity, ensuring long-lasting durability in various environments.
Flexibility: Unlike cement mortar, which can be prone to cracking under stress or movement, tile adhesive has a degree of flexibility. This flexibility allows the adhesive to absorb minor substrate movements without causing the tiles to crack or become dislodged, resulting in a more resilient and long-lasting tile installation.
Versatility: Tile adhesive can be used with a variety of tile types, including ceramic, porcelain, glass, and natural stone, making it a versatile choice for different design preferences and project requirements.
Common Mistakes to Avoid
Certainly! Working with tile adhesive requires attention to detail to ensure a successful installation. Here are some common mistakes and tips to avoid them:
Improper Mixing:
- Mistake: Inadequately mixing the adhesive can lead to inconsistent adhesion and curing.
- Tip: Follow the manufacturer’s instructions for mixing ratios and use a drill with a mixing paddle attachment for thorough mixing. Ensure the adhesive has a uniform consistency without any lumps.
Inadequate Surface Preparation:
- Mistake: Failing to properly clean and prepare the substrate can result in poor adhesion and bonding issues.
- Tip: Clean the surface thoroughly to remove any dirt, dust, grease, or old adhesive. Repair any cracks or uneven spots. Use a primer if necessary to improve adhesion on certain surfaces.
Incorrect Trowel Selection:
- Mistake: Using the wrong trowel size or type can lead to inconsistent coverage and improper bonding.
- Tip: Choose the appropriate trowel size and notch type recommended by the adhesive manufacturer based on the tile size and substrate. Larger tiles generally require a larger trowel with deeper notches to ensure adequate coverage.
Inconsistent Application Thickness:
- Mistake: Applying adhesive unevenly or with varying thickness can cause tiles to sit unevenly and lead to weak spots.
- Tip: Use consistent pressure and angle when spreading the adhesive with the trowel to achieve a uniform thickness. Pay attention to the notch lines on the substrate to ensure proper coverage.
Ignoring Open Time and Pot Life:
- Mistake: Ignoring the open time (time window for applying tiles after adhesive application) and pot life (time adhesive remains workable after mixing) can result in dried adhesive and compromised bonding.
- Tip: Be mindful of the open time and pot life specified by the adhesive manufacturer. Work in small sections, especially in hot or dry conditions, to ensure the adhesive remains workable during installation.
Not Back-Buttering Tiles:
- Mistake: Neglecting to apply adhesive to the back of tiles (back-buttering) can lead to inadequate bonding, especially with large or heavy tiles.
- Tip: Apply a thin layer of adhesive to the back of each tile using the flat side of the trowel before setting it into the adhesive on the substrate. This ensures full coverage and stronger adhesion.
Failure to Allow Sufficient Curing Time:
- Mistake: Walking on or grouting tiles before the adhesive has fully cured can result in displacement and compromised bonding.
- Tip: Follow the manufacturer’s recommended curing time before applying any weight on the tiles or proceeding with grouting. Factors like temperature and humidity can affect curing time, so adjust accordingly.

